Smart Contract Interactions with sdk-core JS library
Prerequisites
Before starting this tutorial, ensure the following software is installed on your machine:
Dependencies Used:
| Dependency | Version | Purpose | Installation Link |
|---|---|---|---|
| Node.js | 18.8.0 | Runtime environment for executing JavaScript outside the browser. | Install Node.js |
| npm | 9.8.1 | Package manager for managing and installing JavaScript libraries. | Included with Node.js installation |
| TypeScript | 5.1.6 | Adds static types to JavaScript to enhance developer productivity and code quality. | Install TypeScript |
You should also install and use NVM, to set a specific Node version in your project.
Once installed, you can use it like:
nvm use 18.18.0
This tutorial uses EOS Authority Block Explorer, but you can use Wire Hub.
Steps
1. Create & set up ts-dapp-sdk-wire
mkdir -p ts-dapp-sdk-wire && cd ts-dapp-sdk-wire && npm init -y && npm install --save-dev [email protected] ts-node node-fetch && mkdir -p src && touch src/index.ts && touch .gitignore tsconfig.json && echo -e "node_modules/\ndist/" >> .gitignore
1.1. Add tsconfig.json
{
  "compilerOptions": {
    "target": "ES2022",
    "module": "CommonJS",
    "lib": ["ES2022", "DOM"],
    "allowJs": true,
    "esModuleInterop": true,
    "forceConsistentCasingInFileNames": true,
    "moduleResolution": "Node",
    "strict": false,
    "outDir": "dist"
  }
}
1.2. Get your private key
You could output a key pair value stored in your wallet by running:
clio wallet private_keys --password=$(cat ~/path/to/my-wallet-pass.txt)
1.3. Add scripts to package.json
Modify scripts in package.json to:
{
  "scripts": {
    "watch": "tsc -w",
    "exec": "node dist/index.js"
  }
}
2. Write the code
In this section, we will set up our application to interact with our local node from Company Contract Tutorial.
2.1. Initialize ApiClient()
import { API, APIClient, FetchProvider, PrivateKey, SignedTransaction, Transaction, AnyAction, Action, PackedTransaction } from "@wireio/core";

const privateKey = "<your-private-key>"

const endpoint = "http://localhost:8888"


const apiClient = new APIClient(
  { provider: new FetchProvider(endpoint) }
);
API Client Initialization
- We import necessary modules like
APIClient,FetchProvider, and transaction-related classes. You can see full SDK reference here. - A private key is defined for signing transactions (make sure to replace it with your actual key).
- We specify the blockchain node’s API endpoint, in this case, a locally running node at
http://localhost:8888. - Finally, we initialize an instance of APIClient, which communicates with the blockchain via the FetchProvider, allowing us to interact with smart contracts for operations like signing and sending transactions.
Open up a terminal and run npm watch to run TypeScript compilation in watch mode. You should see the compiled dist folder.
2.2. Write API calls
code
import { API, APIClient, FetchProvider, PrivateKey, SignedTransaction, Transaction, AnyAction, Action, PackedTransaction } from "@wireio/core";

const privateKey = "<your-private-key>"

const endpoint = "http://localhost:8888"


const apiClient = new APIClient(
  { provider: new FetchProvider(endpoint) }
);

(async () => {

        // Fetch Local Blockchain Info: Retrieves the current blockchain status
        const info = await apiClient.v1.chain.get_info()
        console.log("\nBlockchain Info:");
        console.log(JSON.stringify(info, null, 2));


        // Fetches the current state of the `employees` table from the `company` smart contract, including the number of rows and user details
        const tableRows: API.v1.GetTableRowsResponse = await apiClient.call({
            path: '/v1/chain/get_table_rows',
            params: {
              code: "company",
              table: "employees",
              scope: "company",
              json: true
            },
        });
        console.log(tableRows)

        console.log(`\nEmployees Table Info:`);
        console.log(`- Number of rows: ${tableRows.rows.length}`);
        console.log(`- User emails: ${tableRows.rows.map(a => a.email).join(", ")}`);

        // Obtains and prints the ABI (Application Binary Interface) of the `company` smart contract, detailing its methods and structures
        const abiRes: API.v1.GetAbiResponse = await apiClient.call({
          path: '/v1/chain/get_abi',
          params: {account_name: untypedAction.account},
        });


        const { abi } = abiRes;
        console.log("\nContract ABI:");
        console.log(JSON.stringify(abi, null, 2));

        //Constructs a transaction payload to update the details of an employee named “Jack” and constructs a signature required to authorize this transaction.
        const untypedAction: AnyAction =  {
            account: "company",
            name: "upsertemp",
            authorization: [
              {
                actor: "jack",
                permission: "active"
              }
            ],
            data: {
              user: "jack",
              name: "Jackson Smith!!",
              email: "[email protected]",
              status: "active"
            }
          }

          const action = Action.from(untypedAction, abi);
          const header = info.getTransactionHeader()

          const transaction = Transaction.from({ ...header, actions: [action] })
          const digest = transaction.signingDigest(info.chain_id)
          const privKey = PrivateKey.from(privateKey)

          const signature = privKey.signDigest(digest).toString()
          let signedTrx = SignedTransaction.from({ ...transaction, signatures: [signature] })
          const packed =  PackedTransaction.fromSigned(SignedTransaction.from(signedTrx));


          // Sends the transaction to the blockchain.
          const trx = await apiClient.call({
            path: '/v1/chain/push_transaction',
            params: packed
          })
          console.log("\nTransaction Result:");
          console.log(JSON.stringify(trx, null, 2));

})();
3.Execute the code
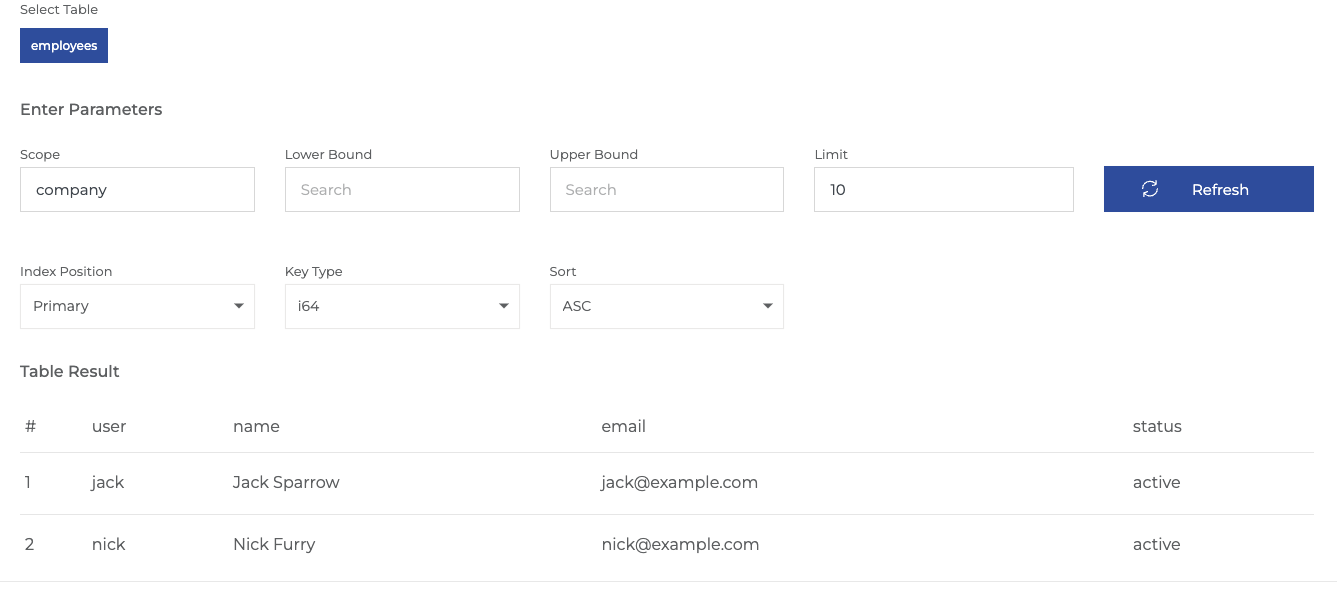
You can inspect the employees table on the EOS Block Explorer before executing the script.
Run npm run exec and you should see output in the console with the logs like:
➜  ts-app-sdk-wire: npm run exec
Blockchain Info:
{
  "server_version": "c83d8e08",
  "chain_id": "8a34ec7df1b8cd06ff4a8abbaa7cc50300823350cadc59ab296cb00d104d2b8f",
  "head_block_num": 538955,
  "last_irreversible_block_num": 538954,
  "last_irreversible_block_id": "0008394a52821c9552c17f8620576d53fe417e29068aee6ba6fe91b31591d052",
  "head_block_id": "0008394bd3b0ae2b818eed6a626ef66c3750a2a7cfff48e61f1bc6a8d5203076",
  "head_block_time": "2024-09-30T13:09:22.000",
  "head_block_producer": "sysio",
  "virtual_block_cpu_limit": 200000000,
  "virtual_block_net_limit": 1048576000,
  "block_cpu_limit": 200000,
  "block_net_limit": 1048576,
  "server_version_string": "v3.1.6",
  "fork_db_head_block_num": 538955,
  "fork_db_head_block_id": "0008394bd3b0ae2b818eed6a626ef66c3750a2a7cfff48e61f1bc6a8d5203076"
}
{
  rows: [
    {
      user: 'jack',
      name: 'Jackson Smith',
      ...
....
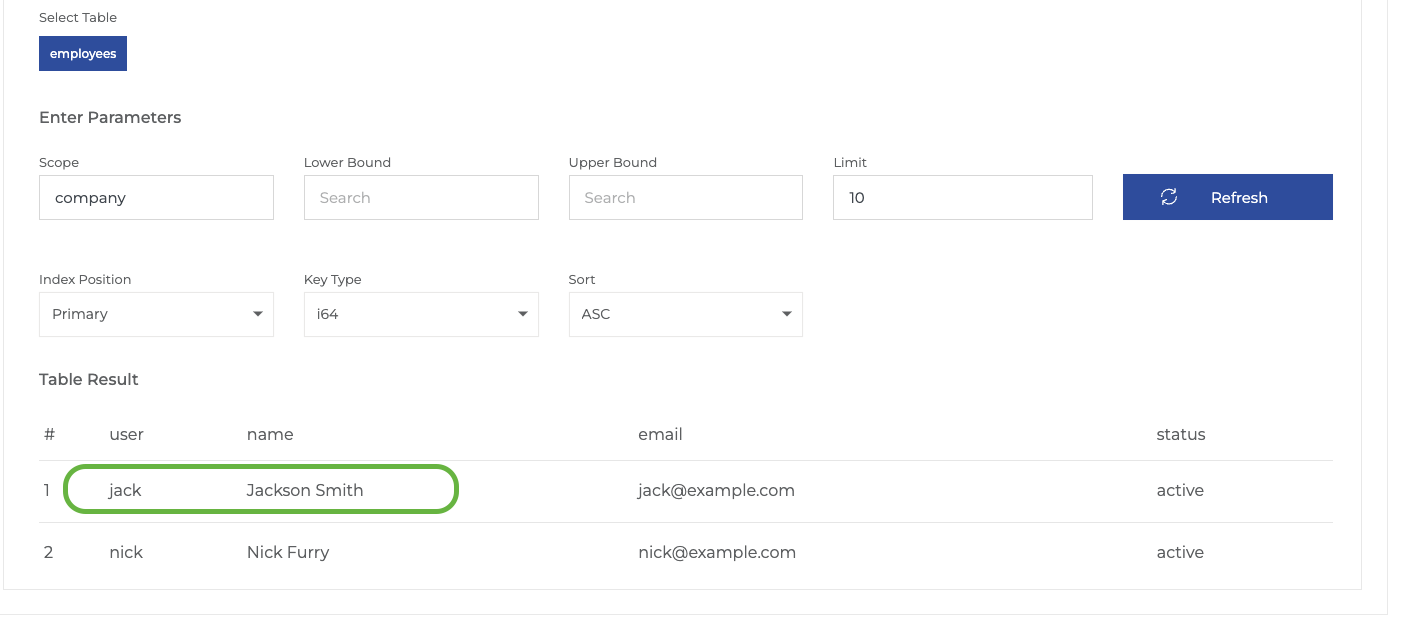
Check update on EOS Block Explorer.
 .
.